Natural Ways To Clean Your Washroom

Washroom Cleaning

Washrooms are where we spent the least amount of time, yet it is an important part of the home. We feel relaxed and calm when we enter into hot soapy water to take a nice bath. Even the standards of a washroom have increased from the past with different tiling options, wallpapers and so on. It also acts as a storage for some of our medical and cosmetic supplements.

Just about everyone wants some measure of privacy in their lives. Even people who, by choice, lived with a household of other people still wanted a room or suite of their own where they could close the door and not be disturbed. The desire for a washroom of one’s own may be part of that wish for some privacy, especially for one’s most personal matters and in that scenario is of utmost importance to keep it hygienic.

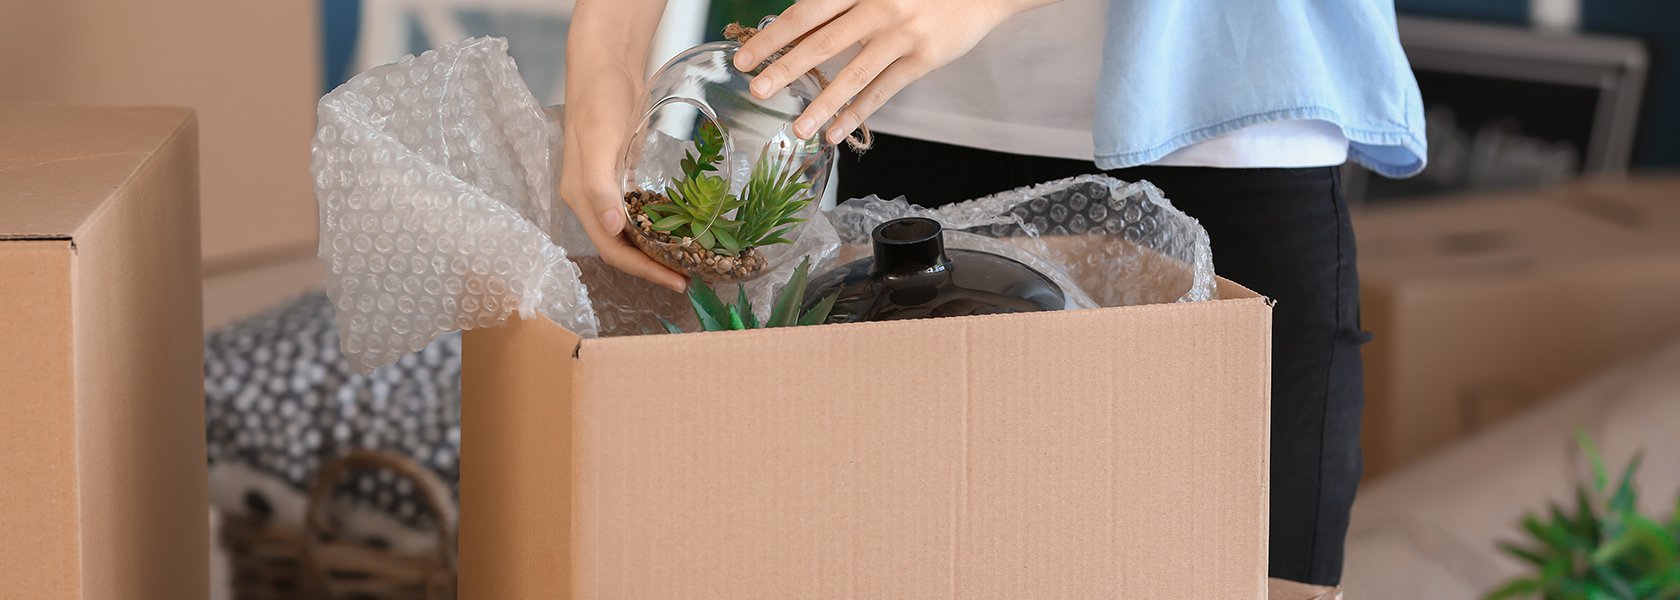
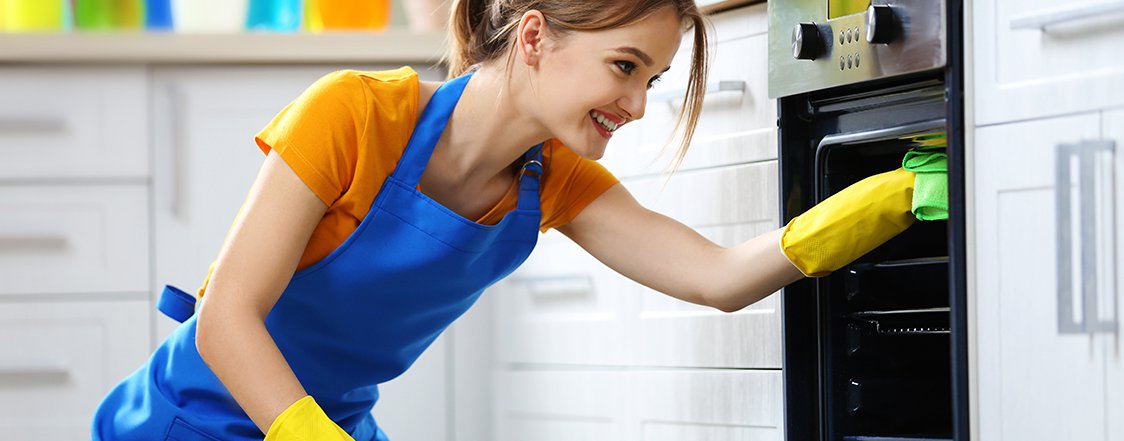
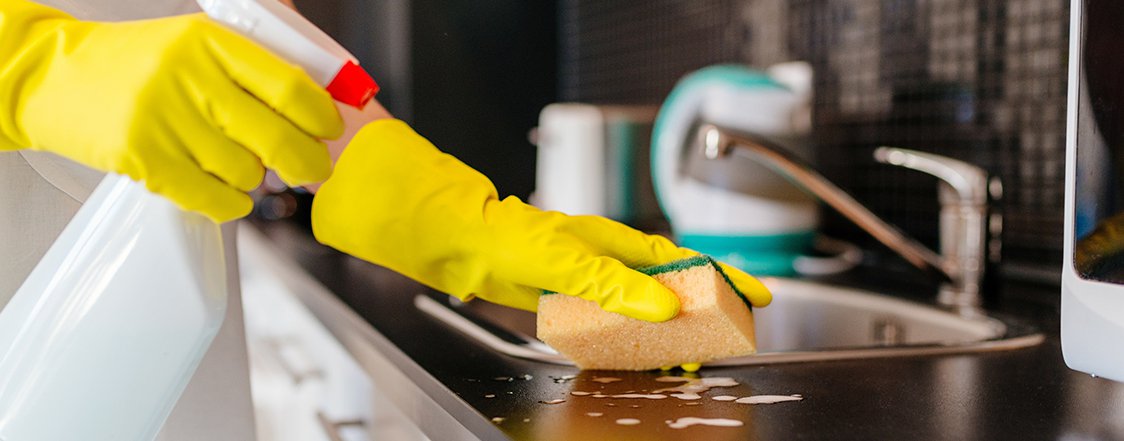
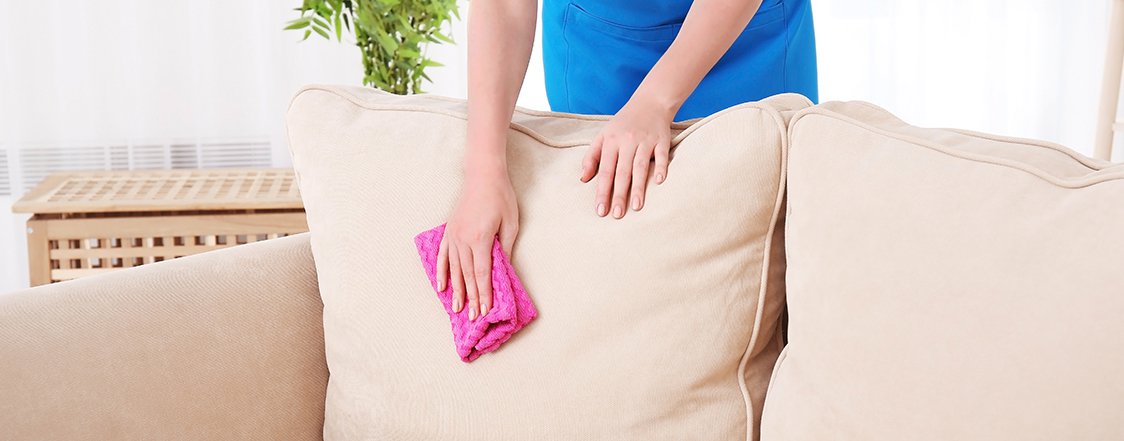
Cleaning the washroom is rarely a job we’re excited to do. Removing soap scum and scrubbing toilets is not anyone’s preferred weekend plan. However, without regular cleaning, a washroom can develop mold and dangerous bacteria which can cause a number of health issues.

Staphylococcus is a bacteria that can usually be found on door handles, in showers and in the vicinity of the toilet and sink. Normal contact with the body does not commonly result in infection or disease, however, if any bacteria find its way to an open cut or sore, a staph infection can occur. The bacteria are easily spread and often contaminates washroom grooming products like razors, facial brushes, etc.

Gastrointestinal viruses are stomach sickness that can be caused by bacteria in the washroom. These are commonly found on washroom surfaces like toilets and sink counters. These kinds of sickness cause stomach pain and cramps. They can also induce diarrhea and vomiting. E. coli and salmonella found in washrooms can cause similar stomach ailments. These bacteria can be passed on through food, which means they can be passed on through fecal matter. Hence, it is important to close the toilet lid before flushing.

washroom

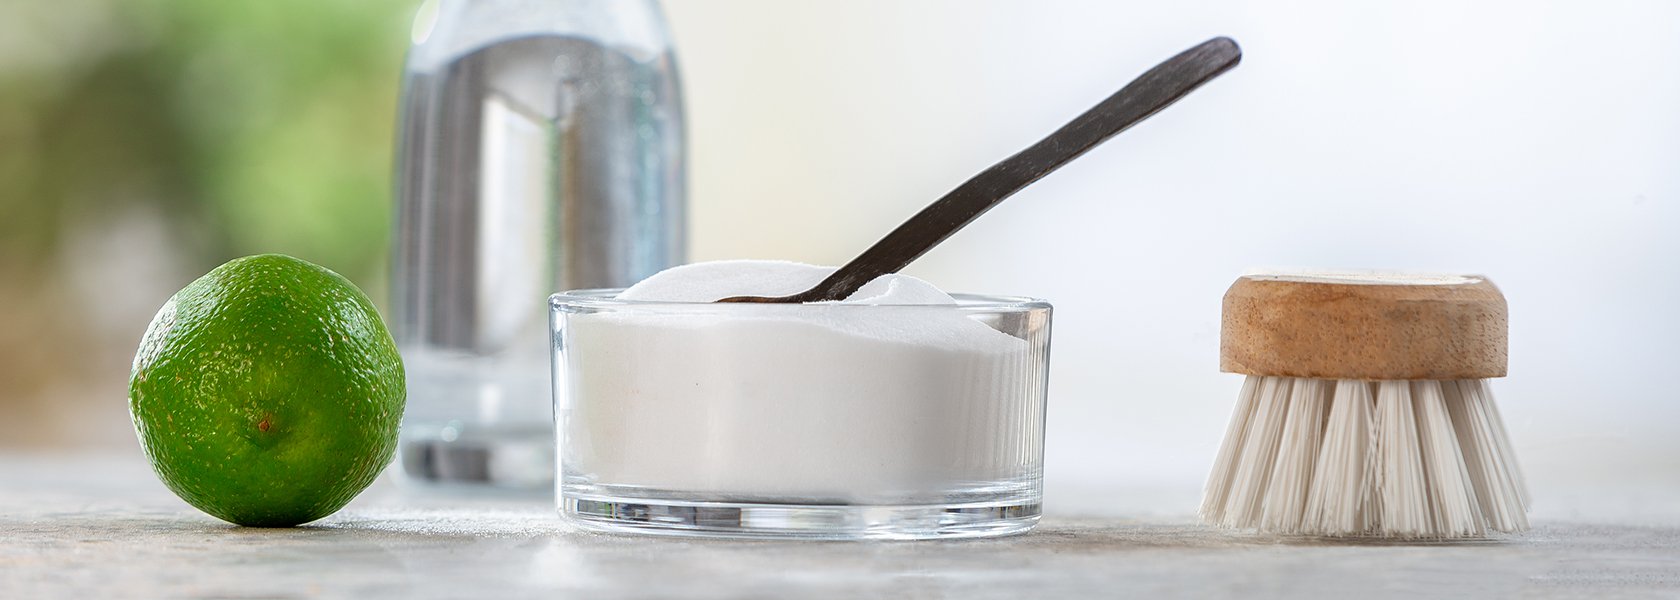
Here are different natural ways to keep your washroom clean and hygienic:

Cleaning The Mirror

Washroom mirrors attract different kinds of embarrassing splatters that can be hard to remove without a cleaning agent. The most simple and chemical-free way to clean your mirror is by using strong black tea (such as Lipton). Black tea contains tannic acid in the tea that cuts through the grime. Spray the solution onto the mirror and rub it with newspapers.

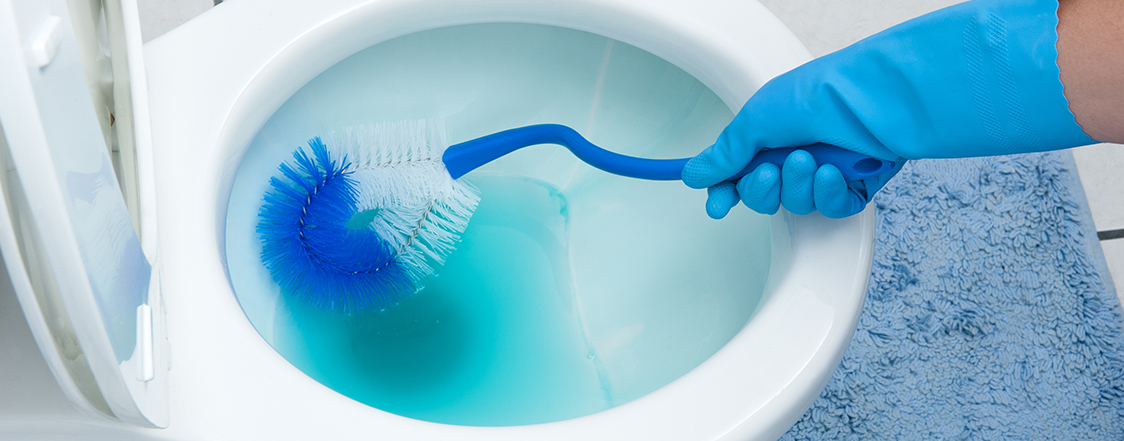
Cleaning The Toilet Bowel

This is the most important part of a washroom which needs to be cleaned properly. Ingredients can be easily found in the kitchen which can get the job done. Add ¼ cup baking soda and ¼ cup white vinegar into your toilet, and let it sit for 15 minutes. When your timer is done, scrub the toilet bowl.

Unclogging The Toilet

You can’t escape the clogging but you can always unclog. Instead of grabbing a chemical-laden detergent, try a home remedy – drop four Alka-Seltzer tablets down the clogged drain, followed by one cup of distilled vinegar. After 10 minutes, rinse with boiling hot water.

Cleaning Showerhead

Vinegar is a resourceful ingredient. Remove your showerhead. Fill part of a plastic bag with vinegar, and drop the shower head into the bag, ensuring that it’s completely covered by vinegar before securing the bag with a rubber band. Soak for an hour, and remove to open your eyes to a brand new looking showerhead.

Making Bathtub Clean

In order to clean your bathtub use grapefruit and salt. They can be useful as a scrub for your tub. Cut the grapefruit in half, and sprinkle some salt on the pink side of the fruit. Wet your tub and sprinkle some more salt on the bottom and use the fruit as a scrubber. Rinse the tub with water.

Hard Water Stains

Lemon is also an equally important ingredient to clean your washroom in a natural way.
It is as commonly used as vinegar. The process is quite simple. Use half of each little scrub brush, thoroughly going over through all the stains. This works especially well on chrome fixtures.

Wiping The Grout

Grout is the middle part between two tiles on the floor. To clean the grout, generously sprinkle baking soda on the floor then mist it using a spray bottle filled with cleaning vinegar. Scrub the dirt and grime using a toothbrush or scrub brush. Wipe down with a microfiber cleaning cloth to reveal brand new looking grout.

How To Pack Your Items For Moving Out

How To Pac

Moving out of your home could be exciting as well as a daunting thing. A new neighborhood, new neighbors, new scenery could be quite overwhelming. And to top it off, you need to pack all the goods and ensure nothing is left out. This itself could be a tricky task if things are not well organized in the first place.

Some people might keep certain things at their home which are not at all necessary and have been hardly used. It is important to discard such items and make room for new ones. It could be unused notebooks, old clocks, outdated electronic devices, extra cables & wires, etc. This will declutter your home of all the unnecessary and unused items.

But it’s not necessary that packing & moving should be a daunting task. All you need is some tips and tricks on arranging your items properly. This article will guide you on how to pack your goods and help reduce your stress of moving to a new home.

Here are some tips to make your packing and moving process more efficient:

Moving

  1. Hire Professional Movers

    Most of the moving companies have a full-service option wherein the movers and packers will box up all your belongings so you don’t have to do it. However, you will have to assist and guide them to help them understand what goes where and in which order.

    This is the best choice if money is not a constraint and if you have to move goods on a very tight deadline with no additional helping hands.

  2. Items Movers Won’t Pack For You:

    Movers and packers may not touch certain items due to several reasons. Either they could be quite personal or could be dangerous to pack and need to be carefully put in a box. Items such as chemical solvents, charcoal, fluid gas, matchsticks, plants, etc. are some of the many items movers and packers may not pack and hence you will need to take care of it.

  3. Declutter Before You Pack

    The moving and packing process is often underestimated. It is advisable that you start going through your belongings at least two weeks prior to your moving date. Refrain from multitasking. Work on one room at a time, start with the big item you don’t want to start moving to your new home like heavy pieces of cupboard, sofa, bed, marble & glass furniture and anything with hazardous chemicals.

  4. Discard Unnecessary Items
    Sort the rest of your belongings into three categories:

    1. SELL – Start looking for buyers online or in and around your neighbourhood.
    2. DONATE – Charity has gone a long way. Find NGOs who are in need of help.
    3. TRASH – The rest is junk. However, you can further segregate the items into recyclable goods, others and discard them accordingly.
  5. Last In First Out Method

    The Last in First Out is quite an effective method. It is time to put all the inventory skills to work. Identify items that you’ll need to find easily at your new house. Load them last inside the moving truck so they’re the first things to get unloaded. This will ensure that important items are easy to access to find when you arrive at your new home.

  6. Label Directionally

    If you have the advantage of knowing the floor plan and layout of your new place, label boxes with directions for where they go, not where they came from. Unpacking and settling in will be easier if all the boxes end up in the rooms where they need to be in.

  7. The Essential Box Pack

    As the title suggests, it is a box full of items you’ll need for your last few nights before you move and the first few nights in your new home before you could start unpacking.

  8. List Out Forgettable Items

    In the midst of the moving process, instincts might tell you that there are certain items that you are most likely to forget. Jot them down almost instantaneously on your smartphone or diary so that you can check this before you move away from your old place. This will save you the trouble of traveling back to your old home once you have already moved everything from there.

  9. Get Help From Friends & Relatives

    Don’t shy away from asking for help from your friends and relatives. They will be more than willing to help you as they can understand your situation and lend you a helping hand. They can also suggest and guide you on how to pack items from their own experience.

Packing Fragile Goods While Moving Out

Packing

Some people are quite obsessed with their packing. They want to make sure all the goods which can be easily broken are packed to perfection so that no items are lost while moving from one home to another. They are gently and neatly packed with extra care. This article will help you to pack your fragile goods to perfection.

Bubble Wrap is widely used to pack fragile items but that’s not enough to save them from turning into little pieces. Some items may also contain an emotional attachment as you might have a memory with it like, who might have gifted it to you or on what occasion was that specific item was used. It could be disheartening if such an item breaks.

Following is a how-to list and the things you need for packing your fragile goods.

packing

Boxes

Get more boxes than you think you will need. The reason being is that it’s better not to pack them bulging out of boxes. Ensure you get various sizes; this helps the movers while moving your things from one point to the other. Consider getting boxes from the shoebox to 2 x 2 feet. Also use bubble wrap, newspaper and packing tape on each fragile item, wherever possible.
Pillows and Blankets

Any fragile items, irrespective of the size, requires proper care while being packed. Place a blanket at the bottom of the box and place the item that is well wrapped in bubble sheets. And place a pillow on the top. Ensure to minimalize the movement of the items, as much as possible.

Glass Cutlery

Cellular inserts are the dividers that are kept inside the boxes to separate the little fragile glassware. The good news is you need not think too much if you can’t get these cellular inserts. The trick is simple – make it double. Make sure everything is packed with 2 layers of packing materials. Use newspapers to fill in the hollow fragile items such as the bowls or vases, socks and other small clothes such as handkerchief can be a replacement to the newspaper here. Never combine the items while packing, keep them individually packed and set aside in the boxes.

Flat Items

Every flat fragile item like plates and photo frames must be wrapped in paper and followed by bubble wrap and stacked vertically in the boxes. Again, layer the box with bubble wrap on all sides and its better to have a blanket below to arrest the movement of the plates and frames.

Shake The Items

Once you have packed them all, tight and secure, shake them once. if you can hear the items rattle, your packing is still insufficient for the fragile items to be safe. Ensure there is not much sound heard that ensures the fragile products are kept intact.

Musical Instruments

Musical instruments too are fragile, irrespective of their size. If they are stringed instruments, ensure they are detuned. For guitars be it may a bass guitar or acoustic guitar, violins, and similar instruments, get a case humidifier to avoid any damage while transporting it. Ensure its plectrums are packed in the case itself. Do not separate the parts of the instruments in different boxes. Keep the extra strings, plectrums, and the belts preferably all in the same case.

Paintings

Wrap a cellophane sheet over the paintings first. Sometimes the print on the newspaper gets imprinted on the painting if it does not have glass protection. Place the paintings between two cardboard sheets. Then wrap the entire piece like a present. It does not matter if you use extra sheets of newspaper to wrap them a couple of times. Tape the painting in a circular motion of full circles. Ensure the entire painting fits into one box. Layer the box with bubble wrap before and after you place the painting inside the box. Repeat these steps until you pack all the paintings and ensure they are placed horizontally.

Mark The Packages

Every box needs to have these markings mandatorily. An upward arrow mark: this states that the box shouldn’t be toppled in any other way. A list of what are the contents inside the box. This would help you while you unbox the items. Most important, stick a paper on the box and write in bold and in uppercase stating “FRAGILE”. This is for the movers. They need not read the different writings on all boxes that are going to be similar, to identify which are the items that are fragile and which are not. Make it easy for them and for you as well to identify the boxes which require extra care.

Full-Time or Part-Time: Which Type of Maid To Hire

house maid

Often families and people living in sharing hire maids to get the basic chores done as they need to utilize their time for other activities and can’t spend time cleaning their homes.

Some families opt for full-time maids as they have other obligations to fulfill and have a lot of requirements at home which can not be fulfilled by family members alone. While others might opt for a part-time maid who would either come every day for a couple of hours, every alternate day or even once a week depending on what’s been mutually agreed.

maid

Here are the advantages and disadvantages of hiring a full-time versus a part-time maid:-

Advantages of a Full-Time Maid:

  • More Time:

    After a long day at work or coming home late at night after an event, you don’t need to worry about cleaning up your home, every single day, if you have a full-time maid. You can also focus on doing more activities for your personal and professional growth by having a full-time maid to take care of everyday chores.

  • Child Care:

    If you are a working couple with kids staying at home or going to school, someone needs to look after them all the time. A trustable full-time maid can take care of your child while you are away from home.

  • Party Cleaning:
    If you’ve hosted an event at your home and have a part-time maid working for you, they may not volunteer to come to your home and clean it as their schedules are not flexible. With an in-house maid, they are easily available to take care of a post-event cleanup. This is important if you host a number of events at your home.

Disadvantages of a Full-Time Maid:

  • Financial Cost:

    It goes without saying that having a full-time maid is a costly thing. Opt for a full-time maid only if it’s worth your budget and lifestyle requirements. Hire a full-time maid if it’s worth the convenience they offer.

  • Responsibility:

    There are legal obligations to be fulfilled in order to have a full-time maid at your home. You will not only need to sponsor their visa but also provide them with accommodation and other benefits. This leads to an additional cost other than their salary.

  • Lack of Privacy:

    Since a full-time maid spends a lot of time at your residence, all your personal details and items kept at home are already known to them. This could lead to a lack of privacy and you may not be able to trust them completely by sharing all the details about your life with them.

Advantages of a Part-Time Maid:

  • Affordable:

    As compared to a full-time maid, part-time maids are more affordable as they are paid by the hour or number of days they will be coming to work at your home. This way, you can get your daily chores done and will not be a huge burden on your wallet.

  • No Responsibility:

    For part-time maids, you are not legally responsible for them, the company from where you hire a maid, is responsible for them. This means that you don’t need to sponsor their visa, take care of their benefits or provide them with transportation and accommodation.

  • More Privacy:

    Since a part-time maid only works for a couple of hours a day or on certain days of the week, they have limited information about your personal life and about physical items kept at your home. This means you have your privacy intact and need not worry about it.

Disadvantages of a Part-Time Maid:

  • Flexibility:

    Part-time maids only work for a couple of hours on certain days. This means that they may not be available if you need them at a different hour of the day. Also, if for some reason you have to go out or attend an event, your part-time maid might be reluctant to change and reschedule the appointment to clean your home.

  • No Child Care:

    If you are a working couple, you can’t expect your part-time maid to take care of your kids. They are only available on certain hours as they are paid accordingly and therefore will not be able to look after your kids, all day.

  • Limited Scope of Work:

    Part-time maids have a very limited scope of work which may not include all the things you need to clean. They may vacuum your hall and clean your kitchen but may not clean your washroom and do laundry for you. This could lead to a lack of fulfilling all your requirements and you may personally end up doing some of the chores.

Tips On Keeping Your Kitchen Clean

Kitchen Clean

Kitchen is where all the delicious food is made with simple yet elegant & nutritious ingredients. It is the place where all the food is not only made but kept too. From tea to spices, from fresh fruits in the fridge to biscuits in the cupboard, everything is stored. Utensils and cutlery items are also kept in the kitchen.

Kitchen is infested with bugs and insects of all sorts as it has food stored in it. To lead a hygienic and healthy life, it is crucial to keep all the food stored away in cans, containers or bottles and shouldn’t be kept in open. But this is not enough to keep your kitchen clean.
Identify what is to be cleaned and then you will know from where to start. Here is a list of some usual things in the kitchen that needs your attention: bottles that smell, stained sink, the cutting board that usually is just rinsed and not washed, and the kitchen floor. These are just a few of the many things you need to consider while cleaning your kitchen.

kitchen cleaning

Stove

Remove the grates and if it has plates along with it and soak them in a bucket of hot water. This will remove the stickiness on it. Once cooled shift them into a bucket of soapy water and then clean it and dry them separately. Next, take a small bowl of baking soda and add hydrogen peroxide. Pour the paste on the places of grease and other areas of the stove. Dip a cloth in the soapy water and wipe the top surface of the stove and followed by the normal water. Replace the grates and stove plates. Your stove is shiny and clean.

Stinky Bottles

When bottles are unused for long, it produces a foul smell. It is not necessary that you need to discard them. All you need to do is pour half a cup of vinegar in it, shake it well allow it to rest for about half an hour. Next, add lukewarm or hot water to it and shake it well. After 2 minutes, you can rinse the bottle. You will have no signs of the bad odor.

Stained Sink

You will need vinegar in a spray bottle and paper towel. Now all you need to do is spray vinegar on your sink and don’t miss the taps. Using the paper towel scrub the stained portion, even newspapers can be an alternative to the paper towels. Rinse the entire sink and taps. Wipe it with a dry cloth. Once you made sure it’s dry, sprinkle the sink with all-purpose flour. Sprinkle them on the knobs and especially on the drain use a dry cloth and wipe the flour off. Your sink will be sparkling as if it’s a new one.

Cutting Board

In order to clean the cutting board, all you need is half a lemon and 3 spoons of salt. Spray the salt and scrub the tray using lemon. Rinse well to restore your old cutting board as a brand new one.

The Base of Copper Dishes

No matter the grease or the color that was once a golden pink that has turned to black. Reverse the vessel, spray some salt and pour vinegar on top of it, allow it to rest before you rinse to see a brand-new look of your pans.

Microwave

Microwave is the easiest of all to clean. Squeeze 3 lemons and pour the juice in a small microwave cup. Now heat this in the microwave for not more than three minutes. Ensure the content inside the microwave is cooled enough for you to take it out. Remove the turntable microwave plate that’s inside so that you can wash it separately. Switch off the microwave and clean the inside of the microwave with a wet cloth. You will be surprised to see that the grease and stains disappear in one wipe. Replace the washed turntable plate into the microwave. Wipe the outside portion of the microwave with a damp cloth followed by a dry cloth.

Kitchen floor

Add half a cup of baking soda to 6 to 7 liters of water. Now pour the solution on the lines of the tiles or the marble and scrub it with a hard bristle brush. You will be surprised to see the floor is new as never before.
Note: Never mix vinegar with bleach to clean and distilled vinegar can always harm the surface of the stone may it be granite or marble. Use only cleaning vinegar for cleaning purposes.

How to Deep Clean Your Entire Home

Move In and Move Out Deep Cleaning Services in Dubai

Cleaning your home regularly is a tedious task. It is not easy to maintain your dining hall, living room and bedroom in perfect condition, all the time. And if you have frequent visitors (especially the ones who do not inform you in advance) then it is crucial to keep every single spot extremely tidy.

It is important to live in a hygienic house for your health along with other members living with you. If your home environment is hygienic and well cleaned, you will feel relaxed, gain peace of mind and get a good sleep without the fear of bugs and insects running all over the house.

Also, it is always recommended to deep clean your house once in 3 months to keep the home hygienic & maintain a healthy environment at home.

deep cleaning

Here are some tips and things to look out for while cleaning your home:

Bedrooms

Trick:

Pile everything in one spot, from the floor and cupboard (This could be your bed). Cover it with a bed sheet or two.

Do not miss:

Use a wet cloth followed by a dry towel and run through the fan blades, the portion behind the fan connected to the ceiling, cot’s surface, window grills and sills, all four dimensions of the door including doorknobs and then sweep and mop the floor. Pay attention to the lines between the tiles and the places where the walls meet the floor.

Benefits:

A bedroom is a place we spend 27% of our day to day life. When deep cleaning has happened, the energy flow within the room is amplified to have an impact on our lives.

Dining and Kitchen

The kitchen is where life flows from. We try to put off cleaning this place as we assume it’s too long to implement change or it’s too time-consuming. Here are some ways to make it easy for you.

Trick:

Sort-Clean-Discard-Arrange

Start cleaning from left to right until you reach the place you had begun. Have some garbage bags, and boxes arranged. Work one shelf at a time. Set up a stage outside the kitchen, as stated earlier for the bedroom.

Do not miss:

Start cleaning shelf by shelf, from the refrigerator to the kitchen drawers, and then the cabinet
one by one. Transport each area to the stage and put them into different categories, one for plates, cups and other for crockeries. So will it be for the cooking ingredients, Pulses, powders, and cereals, etc?

Once you have segmented the entire kitchen on the stage outside. You also get an idea of how many items has crossed the expiry date. You can discard the ones which are past its expiration date.

It makes it easier to clean the entire space, don’t miss the spaces below the burners, fridge and washing machine or dishwashing machines. The windows, floor vents, the vacuum and then the floor in itself at last.

Now after you have discarded what you do not need, start arranging rack by rack. Donate anything that has not been used for two months and has a shelf life.

Benefit:

Do you realize you have kept this a pest-free zone by now? It does not keep you clean alone but it also keeps you healthy. You have now donated things that you have not used and you know what you need to purchase. This helps you save money for your next purchase as you are now aware of what items you have and what you need to buy. Cleaning kitchen gives you a clear picture of what you have in the kitchen.

Living Room/Hall

The living room is the place that’s mostly occupied by everyone and hence it has more chances to get messier and dirtier. The most scattered and as tough as it may seem to be, it’s the easiest to clean.

Trick:

We will follow the top-down approach. Here’s the checklist of things you need to clean in the living room.

Do not miss

  • The digital devices like laptops, TV, play stations and telephone.
  • Stands
  • Remote controls
  • Coffee tables
  • Extension cables
  • Top of every furniture
  • Showcase
  • Vacuum the sofa
  • Clean the coasters and toys.
  • Clean below the sofa sets
  • Behind the windows and doors
  • Shampoo the carpets and keep them in sunlight
  • Front and back of the main entrance door

Benefits:

By keeping your hall clean, you won’t panic when an uninvited or a guest at a short notice arrives and rings the doorbell. You will feel good and have a sense of accomplishment. Ensure you have dusted the room and spray an air freshener to give it an amazing aroma.

Bio – Enzymes: Eco-Friendly Way of Cleaning

Eco Friendly Cleaning

Many people are adapting the environment-friendly alternatives to non-biodegradable material for their routine life. From plastic to cloth bags, using aluminium or ceramic cutlery (even for outdoors) instead of single-use plastic. But it is not only plastic that is polluting our environment.

Using alternatives to plastic is just one of the many ways to stop polluting our earth. We don’t consider the chemicals mixing with the water which flows into our rivers and oceans or the type of toxic air which chemicals create and we breathe every second. We should keep in my mind the consequences of each activity we do which can, in any way, harm the environment.

To tackle this, we must ensure to reduce the usage of chemicals as much as possible in our daily life. One of the common usages of various chemicals used at home is for cleaning it. From Clorox to different types of dishwashing detergents, many chemicals are used at our home.

There is a way to clean your home in an eco-friendly way!

Bio-enzyme cleaners are organic solutions produced by fermentation of citrus fruits, vegetables, sugar, and water. These cleaners contain specific quantities and qualities of bacteria (non -pathogenic i.e. good bacteria) along with enzymes and microbial nutrients that essentially digest chemical and organic waste (soils). Whereas an enzyme is a type of protein that can break up complex molecules into smaller pieces.

Bio Enzymes are a mixture of complex organic substances such as proteins, salts and other materials that are by-products of the naturally occurring Bacteria or Yeast that are used to make the Bio-Enzyme cleaners.

It can be used for:

  • Mopping floor
  • Disinfecting tabletops
  • Removing stains from the sink, basins, toilet bowls, tiles windows and dishes
  • Removing limescale on taps and other steel appliances
  • De-clogging drains
  • Removing mold

Some of the benefits of using bio-enzyme cleaners are:

  • An eco-friendly alternative to the hard fuel chemical solutions including Acids, bleach, phenyl and other chemical solutions we typically use in households to wash our bathrooms, clean toilets, wipe our floors, tiles and other surfaces.
  • Non-toxic and biodegradable, which means they’re safe to use in any room of your home.
  • Comparatively safer for users and the environment compared to traditional cleaning chemicals, especially if they have been green certified.
  • Experience allergy free cleaning.
  • Pet-friendly.
  • To decontaminate 1000 liters of water all you need is one liter of bio-enzymatic cleaner. Each time you pour this solution in drains, you are helping in purifying the water.
  • Inexpensive, effective and versatile.
  • A few of the bio-enzymatic cleaners are designed to work up to 80 hours after they are applied.

Below are the ingredients and step-by-step method on how can you create bio-enzyme cleaners at your home:

Ingredients:

  • 1 part jaggery,
  • 3 parts lemon and orange peels,
  • 10 cups of water

You can use a cup, mug or vessel to measure your ingredients according to your needs.

Method:

  1. Heat the water in a vessel and start adding jaggery. Make sure the jaggery cubes are cut into small pieces to ensure they dissolve quickly. Keep stirring till all the jaggery is dissolved.
  2. Once dissolved, let the solution cool till it reaches room temperature.
  3. Meanwhile, fill a plastic bottle with the peels. (Make sure you use a plastic bottle because unlike metal or glass, the plastic will allow the gases that form during chemical reactions to expand. This is also a great way to reuse disposable plastic bottles at your home)
  4. When the jaggery solution attains room temperature, fill it in the bottle along with the peels.
  5. Side Notes:

    1. The cap needs to be air-tight to allow uninterrupted chemical reactions. However, if the bottle you are using has a small opening, make sure you open the cap twice a day to release the gases formed.
    2. The first batch of bio-enzymes takes about 90 days to prepare. The next batch, however, can be quickened if you use a part of the old batch with the fresh one.
    3. As is normal with most eco-friendly, green products, you will need to be patient for its preparation.
    4. The jaggery accelerates fermentation and is used in a very small quantity. So, the bio-enzymes do not attract any insects.

    If you find it difficult or do not have time to spend on creating bio-enzyme cleaners at home, do not worry, they can be easily found in supermarkets or groceries nearby your area.

    Or you can book online a professional cleaning service near you who are experts in eco friendly cleaning.

A Cleaning Guide For Your Fabric Couch

Fabric Couch

Couch is a resting place for the people living in your apartment who would want to either watch TV, surf the internet or just relax and take a nap on it. It is also a place where you would either eat or make notes for some work you might be doing and therefore might end up slipping some small crumbs of your food or pens under the couch.

Couch is the place where we spent most of the time during the day. If kept unclean, it could lead to an increase in insects and bugs which would lead to an unhygienic environment. Therefore, It is essential to keep it clean and ensure to make it an insect-free area. It might seem difficult at first as to how to go about cleaning a sofa but this guide will make it easy for you to do so.

Here are some ways to keep your fabric couch clean:

Fabric Couch 1

  • Read Manufacture’s Instructions:

    Before applying any detergents, cleaning agents or solvents, always check for the instructions sent from the manufacturer. This will help you understand what type of cleaning agents are to be used on the particular type of material. If cleaning agents are used without reading the instructions, then your couch could be damaged permanently. Therefore, it is advised to read the instructions before you start the cleaning process.

  • Remove Stains:

    If a spill or stain occurs, remove it as soon as possible. If the stain or spill is not treated on time, it could settle in and would get harder for you to remove afterward. Use the right cleaning agents and detergents and apply only on the stains and not their entire area. Use a cup or bottle cap to measure the quantity of the cleaning agent.

  • Remove Loose Particles:

    Use a stiff brush to remove dust and dirt from the entire couch. This will remove any and all particles which stayed over the couch from the top. Take all the dirt on one side of the couch, use a dustpan to take all the dirt unto it and discard it in the trash can. All the dust is removed and all the solid remains from the surface will be gone.

  • Vaccum:

    Since we tend to eat on the sofa while watching TV or browsing the internet, there could be food crumbs and other small waste particles that won’t be seen on the top of the sofa. These are usually found under the seat of the sofa or on the sides. This can’t be removed using a brush as they have to be bought on the surface first. Use a vacuum to pull such remains out of it before scrubbing. There are small vacuum cleaners available (mainly used to clean cars) which could use for cleaning the sofa.

  • Use Baking Soda:

    Baking soda has more purpose than just baking. It can be used as a cleaning agent to remove deep-set stains on couches. It can help remove bad odor and loosen the stains by sprinkling it over the couch.

    You can also make your own baking soda solution at home. Take a bowl and mix equal parts of baking soda and water. Let the baking soda sit for about 15-20 minutes. Once the baking soda has removed the stains, use a brush or a vacuum to clean it from the surface.

  • Utilize Recommended Products:

    Start cleaning your couch with a recommended cleaning solvent. Using the recommended solvents helps you to clean the couch without any damage. If you are not sure whether a particular solvent is right for cleaning your couch, test it on a small portion of your couch which is not visible and observe if any discoloration takes place. Follow the instruction on the package in order to clean it properly, without causing any damage.

  • Dry it Using Soft Towel:

    Cleaning with a solvent and water means your couch will be wet and you won’t be able to sit on it, immediately after cleaning it. To dry it off, pat down all the wet areas with a dry cloth (preferably a towel) so that moisture gets soaked up. Once all the wet areas are dried off, gently remove any remaining cleaning solvent using a brush.

  • Let it Air Dry:

    Even though you have dried it off using a dry towel, your couch might be still wet. Let it dry off overnight to ensure it has 100% dried off. Avoid sitting on it until then, if possible, as it might still be slightly wet.

If you don’t have the right equipment & adequate time it is always preferable to book a professional service for sofa and chair cleaning online